Ring Doorbell is a revolutionary device that has made home security much more accessible and convenient for homeowners. With its smart technology, you can keep an eye on your home from anywhere in the world, receive instant alerts when someone is at your door, and even communicate with visitors without opening the door. However, installing a Ring Doorbell on brick without drilling can be a daunting task for many people. Brick surfaces are notoriously difficult to drill into, and many homeowners are hesitant to damage their property by attempting to install the doorbell.
In this guide, we will provide you with a comprehensive guide to installing a Ring Doorbell on brick without drilling.
Table of contents
Section 1: Preparing for Installation
Before you begin the installation process for your Ring Doorbell on brick without drilling, it’s important to prepare by gathering all the necessary tools and materials. Here’s what you’ll need:
Tools
- Screwdriver
- Hammer
- Pry bar
- Adhesive strips (strong enough to hold the weight of the Ring Doorbell)
Materials
- Ring Doorbell
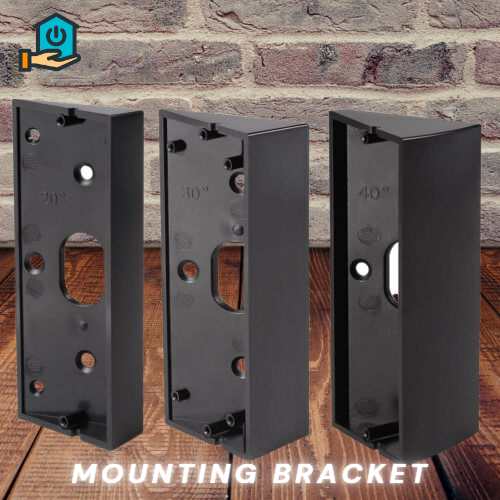
- Mounting bracket
- Masonry screws (optional, in case adhesive strips are not enough)
- Rubbing alcohol and a clean cloth
Once you have all the tools and materials, you need to choose the perfect spot for your Ring Doorbell. Make sure that the spot you choose has a clear view of your front yard or porch and is easily accessible for visitors. Additionally, it’s important to ensure that the surface is clean and dry before installation. Use rubbing alcohol and a clean cloth to wipe down the surface and remove any dust, dirt, or debris. This will help the adhesive strips stick better.
Pro tip: If you want to add extra security and stability to your installation, you can use masonry screws in addition to the adhesive strips. However, this will require drilling into the brick, so be sure to proceed with caution.
By preparing adequately, you will ensure a smooth and stress-free installation process for your Ring Doorbell.
Section 2: The Installation Process
Now that you have all the necessary tools and materials, and have chosen the perfect spot for your Ring Doorbell, it’s time to start the installation process. Here are the steps for installing a Ring Doorbell on brick without drilling:
Step 1: Attach the mounting bracket to the Ring Doorbell
- Take the mounting bracket and attach it to the back of the Ring Doorbell using the screws provided in the box.
Step 2: Apply adhesive strips to the mounting bracket
- Peel off the adhesive strips and apply them to the back of the mounting bracket. Ensure that the adhesive strips are positioned evenly and firmly.
Step 3: Position the mounting bracket on the brick surface
- Position the mounting bracket on the desired spot on the brick surface. Utilize a spirit level to ensure that it is perfectly aligned.
Step 4: Apply pressure to the mounting bracket
- Apply pressure to the mounting bracket, making sure it adheres to the brick surface properly. Use a hammer or a pry bar to ensure the adhesive strips stick to the surface.
Step 5: Attach the Ring Doorbell to the mounting bracket
- Once the mounting bracket is securely attached to the brick surface, attach the Ring Doorbell to the bracket. Push the doorbell onto the bracket until it snaps into place.
Step 6: Adjust the angle of the Ring Doorbell
- Adjust the angle of the Ring Doorbell to make sure it’s facing the desired area. Use the level to make sure it’s level.
Step 7: Test the Ring Doorbell
- Test the Ring Doorbell to ensure that it’s working properly. Press the button and make sure you can hear the chime and that the live video feed is working.
If the adhesive strips are not enough to hold the Ring Doorbell securely, you can use masonry screws in addition to the adhesive strips. However, be sure to use caution when drilling into the brick surface.
By following these steps, you should have a properly installed Ring Doorbell on your brick surface without any drilling required.
Section 3: Testing and Completion
Now that you have installed your Ring Doorbell on your brick surface without drilling, it’s time to test it and make any necessary adjustments. Here are the steps for testing and completing the installation process:
Step 1: Adjust the motion detection settings
- Depending on your Ring Doorbell model, you may need to adjust the motion detection settings to suit your preferences. Use the Ring app to adjust the settings according to your needs.
Step 2: Customize the doorbell’s features
- Use the Ring app to customize the doorbell’s features, such as setting up notifications, setting up a shared user, and configuring the chime sound.
Step 3: Test the doorbell’s functionality
- Test the doorbell’s functionality by pressing the button and making sure the live video feed is working properly.
Step 4: Enjoy your new Ring Doorbell
- Congratulations! You have successfully installed your Ring Doorbell on your brick surface without drilling. Indulge in the enhanced security and convenience it offers.
Remember to periodically check the adhesive strips to ensure they are holding up and adjust the doorbell’s angle if necessary. If the adhesive strips fail to hold up over time, you can use masonry screws to secure the mounting bracket to the brick surface.
By testing and completing the installation process, you will be able to fully utilize the features of your Ring Doorbell and ensure that it’s working properly to keep your home secure.
FAQs
Will double-sided tape hold up in extreme weather conditions?
The selection of tape is contingent upon its type. Make sure to choose a tape that is designed for outdoor use and can withstand extreme temperatures.
Can I use this method to install a Ring Doorbell on other surfaces besides brick?
Yes, you can use this method to install a Ring Doorbell on other surfaces such as stucco, wood, or metal.
Will attaching the Ring Doorbell with tape damage the brick?
No, the tape should not damage the brick as long as it is removed properly.
Is it possible to install a Ring Doorbell without any tools?
No, you will need a few tools such as wire clips, a level, and alcohol wipes to install a Ring Doorbell.
Can I hire a professional to install my Ring Doorbell?
Yes, if you are not comfortable installing the Ring Doorbell yourself, you can hire a professional to do it for you.
Also Read: Doorbell Activity Zone Not Working.
Conclusion
Installing a Ring Doorbell on a brick surface without drilling may seem like a daunting task, but with the right tools, materials, and instructions, it can be done easily and effectively. By following the steps outlined in this article, you can have a properly installed Ring Doorbell on your brick surface without damaging your property.
Remember to choose the perfect spot for your Ring Doorbell, prepare the surface properly, and use the right tools and materials. By testing and completing the installation process, you can fully utilize the features of your Ring Doorbell and enjoy the added security and convenience it provides.
Overall, installing a Ring Doorbell on a brick without drilling is a great option for homeowners who want to add a smart security device to their homes without damaging their property. With a little bit of effort and patience, you can have a fully functional Ring Doorbell installed on your brick surface in no time.