Last updated on May 15th, 2024 at 06:01 pm
Facial steamers are a popular skincare tool that can provide numerous benefits, from deep cleansing and pore unclogging to hydration and relaxation. Regular use of a facial steamer can help improve the overall health and appearance of the skin. However, to ensure optimal performance and longevity, proper cleaning and maintenance are crucial. In this comprehensive guide, we will walk you through the step-by-step process of how to effectively clean your facial steamer.
By following these instructions, you can keep your facial steamer in top condition, free from dirt, mineral deposits, and bacteria, and ensure it continues to deliver the desired results for your skincare routine. So, let’s dive into the details of how to clean your facial steamer and keep it in tip-top shape!
Table of contents
- Step 1: Gather Cleaning Supplies
- Step 2: Disconnect and Empty the Steamer
- Step 3: Disassemble the Facial Steamer
- Step 4: Clean the Water Reservoir
- Step 5: Clean the Nozzle and Steam Outlet
- Step 6: Clean the Exterior of the Facial Steamer
- Step 7: Reassemble the Facial Steamer
- Step 8: Final Tips and Maintenance
- Frequently Asked Questions
- Conclusion
Step 1: Gather Cleaning Supplies
Before you start cleaning your facial steamer, it’s essential to gather the necessary cleaning supplies. Here is a comprehensive roster of the essential requisites you shall require:
Non-abrasive cleaner
Choose a gentle, non-abrasive cleaner that is safe for the material of your facial steamer. Avoid using harsh chemicals or abrasive cleaners that can damage the steamer’s components.
Vinegar or mild soap
Vinegar or mild soap can be used as an effective cleaning agent for removing mineral deposits and grime from the water reservoir and other parts of the facial steamer. Make sure to use a mild soap that doesn’t contain any harsh chemicals or fragrances.
Soft brush or cotton swabs
A soft brush or cotton swabs are handy tools for cleaning hard-to-reach areas such as the nozzle and steam outlet. Choose a brush or swabs that are gentle and won’t scratch or damage the surfaces of the facial steamer.
Clean, lint-free cloth or towel
You’ll need a clean, lint-free cloth or towel for wiping down the exterior surfaces of the facial steamer after cleaning. Avoid using rough or abrasive cloths that can leave scratches on the steamer’s surface.
Water
You’ll need water for rinsing and flushing out the cleaning solution from the facial steamer. Use clean, filtered water to prevent further mineral deposits from forming.
Optional: Essential oils or lemon juice (for odor control)
If your facial steamer has developed an unpleasant odor, you can add a few drops of essential oil or lemon juice to the water reservoir to freshen it up. However, make sure to check the manufacturer’s instructions and recommendations before adding any additional ingredients to your facial steamer.’

Step 2: Disconnect and Empty the Steamer
Before you begin cleaning your facial steamer, it’s crucial to disconnect it from the power source and empty the water reservoir. Here’s how to do it:
-
Turn off and unplug the facial steamer: Safety first! Make sure the facial steamer is turned off and unplugged from the power source to prevent any electrical hazards during the cleaning process.
-
Empty the water reservoir: Carefully remove the water reservoir from the facial steamer, following the manufacturer’s instructions. Dispose of any remaining water in the sink or drain.
-
Remove any attachments or accessories: If your facial steamer has any attachments or accessories, such as a steam mask or nasal cone, detach them from the main unit for separate cleaning.
-
Inspect for any visible debris or mineral deposits: Take a close look at the water reservoir and other parts of the facial steamer for any visible debris, dirt, or mineral deposits. Use a soft brush or cotton swabs to gently remove any stubborn residue.
By disconnecting the facial steamer from the power source, emptying the water reservoir, and removing any attachments or accessories, you’ll ensure a safe and thorough cleaning process. This step sets the foundation for effectively cleaning your facial steamer and maintaining its performance.
Step 3: Disassemble the Facial Steamer
To clean your facial steamer thoroughly, it’s essential to disassemble it carefully. Disassembling the facial steamer allows you to access all the different components and clean them individually. Here’s how to do it:
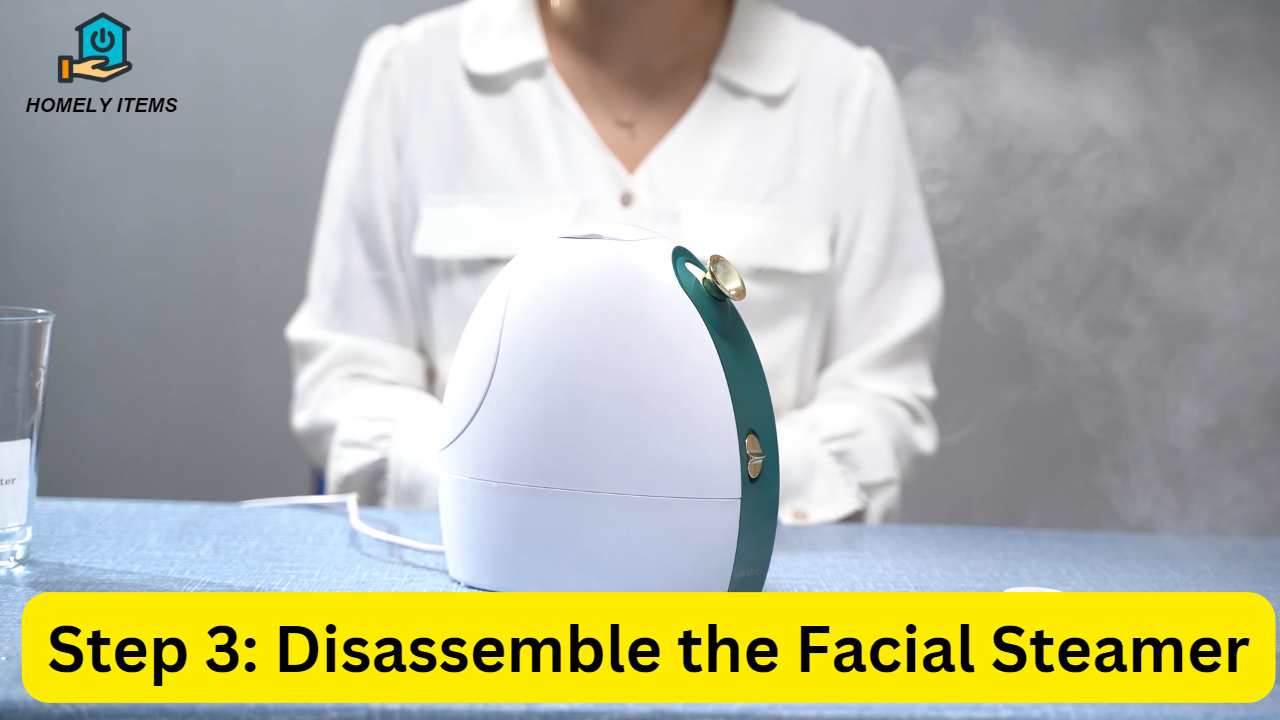
-
Refer to the manufacturer’s instructions: Each facial steamer may have specific disassembly instructions provided by the manufacturer. Refer to the instruction manual or the manufacturer’s website to understand how to disassemble your specific facial steamer properly.
-
Remove the water tank and any removable parts: Most facial steamers have a removable water tank that can be easily taken out. Carefully remove the water tank and any other removable parts, such as the steam nozzle, mask or cone, and other attachments.
-
Inspect and clean individual components: Once you have disassembled the facial steamer, inspect each component for dirt, mineral deposits, or other debris. Use a non-abrasive cleaner, soft brush, or cotton swabs to clean each component thoroughly. Pay close attention to the steam nozzle and water tank, as these are often the areas where mineral deposits accumulate.
-
Rinse with water: After cleaning the individual components, rinse them thoroughly with clean, filtered water to remove any cleaning solution residue.
-
Dry the components: Use a clean, lint-free cloth or towel to dry each component completely before reassembling the facial steamer.
By carefully disassembling your facial steamer and cleaning each component individually, you’ll ensure a thorough cleaning process and prevent any buildup of dirt or mineral deposits. Properly cleaned and dried components will contribute to the optimal performance and longevity of your facial steamer.
Step 4: Clean the Water Reservoir
The water reservoir of your facial steamer is a crucial component that requires special attention during the cleaning process. Mineral deposits and impurities can accumulate in the water reservoir over time, affecting the performance and effectiveness of your facial steamer. Here’s how to clean the water reservoir effectively:
-
Prepare a cleaning solution: Mix a solution of equal parts of distilled water and white vinegar. Avoid using harsh chemicals or abrasive cleaners, as they can damage the water reservoir.
-
Fill the water reservoir with the cleaning solution: Pour the cleaning solution into the water reservoir of your facial steamer until it’s about half full. Allow the solution to sit for approximately 15-20 minutes to loosen any mineral deposits or impurities.
-
Use a soft brush or cloth to clean: After the cleaning solution has had time to work, use a soft brush or cloth to gently scrub the inside of the water reservoir. Pay close attention to any areas with visible mineral deposits or buildup. Avoid using abrasive materials that could scratch or damage the water reservoir.
-
Rinse thoroughly: Once you have cleaned the water reservoir, rinse it thoroughly with clean, filtered water to remove any remaining cleaning solution residue.
-
Dry the water reservoir: Use a clean, lint-free cloth or towel to dry the water reservoir completely before reassembling it with the facial steamer.
By regularly cleaning the water reservoir of your facial steamer with a gentle cleaning solution, you’ll prevent mineral deposits and impurities from affecting its performance and extend its lifespan. A clean water reservoir will ensure that you enjoy the full benefits of your facial steamer, providing you with a refreshing and rejuvenating facial steaming experience.
Step 5: Clean the Nozzle and Steam Outlet
The nozzle and steam outlet are critical components of a facial steamer, as they are responsible for delivering the steam to your face. Over time, these parts can become clogged with mineral deposits or other impurities, which can affect the effectiveness of the steam. Here’s how to clean the nozzle and steam outlet of your facial steamer:
-
Disconnect the facial steamer: Ensure that the facial steamer is unplugged and cooled down before attempting to clean the nozzle and steam outlet.
-
Use a cleaning solution: Prepare a solution of equal parts distilled water and white vinegar or a mild detergent. Avoid using harsh chemicals or abrasive cleaners, as they can damage the components.
-
Dampen a soft cloth or cotton swab: Dip a soft cloth or cotton swab into the cleaning solution, ensuring that it’s not overly saturated. Gently wipe the nozzle and steam outlet to remove any visible mineral deposits or impurities.
-
Pay attention to small crevices: Use a toothpick or a small brush to reach into any small crevices or hard-to-reach areas around the nozzle and steam outlet. Exercise care to prevent harm to the constituent parts.
-
Rinse thoroughly: After cleaning, rinse the nozzle and steam outlet with clean, filtered water to remove any cleaning solution residue. Ensure that all traces of the cleaning solution are thoroughly rinsed off.
-
Dry the components: Use a clean, lint-free cloth or towel to dry the nozzle and steam outlet completely before reassembling them with the facial steamer.
Step 6: Clean the Exterior of the Facial Steamer
Cleaning the exterior of your facial steamer is an essential step to keep it looking clean and well-maintained. Dust, dirt, and fingerprints can accumulate on the surface of the facial steamer, affecting its overall appearance. Here’s how to clean the exterior of your facial steamer:

-
Unplug and cool down the facial steamer: Make sure the facial steamer is unplugged and has cooled down completely before cleaning the exterior.
-
Use a gentle cleaning solution: Prepare a mild cleaning solution using warm water and a gentle detergent or mild soap. Avoid using abrasive cleaners, as they can scratch or damage the surface of the facial steamer.
-
Dampen a soft cloth or sponge: Dip a soft cloth or sponge into the cleaning solution, ensuring that it’s not overly saturated. Gently wipe the exterior surface of the facial steamer, paying attention to any visible dirt, dust, or fingerprints.
-
Pay attention to buttons and controls: Use a cotton swab or a soft brush to clean around buttons, controls, or other small crevices on the exterior of the facial steamer. Be gentle to avoid damaging the components.
-
Rinse and dry: After cleaning, rinse the cloth or sponge with clean water and use it to wipe away any residual soap or cleaning solution from the exterior of the facial steamer. Finally, use a clean, dry cloth or towel to dry the surface thoroughly.
Regularly cleaning the exterior of your facial steamer will not only keep it looking clean and well-maintained but also help to remove dirt and debris that may affect its performance over time. By following these simple steps, you can ensure that your facial steamer remains in top condition and provides you with a refreshing and rejuvenating facial steaming experience every time you use it.
Step 7: Reassemble the Facial Steamer
After thoroughly cleaning the various components of your facial steamer, it’s time to reassemble them before your next use. Here’s how to reassemble your facial steamer:
-
Refer to the manufacturer’s instructions: Consult the manufacturer’s instructions or user manual to ensure that you are correctly reassembling the facial steamer according to their guidelines. Different facial steamers may have slightly different reassembly processes.
-
Connect the components: Carefully connect the disassembled parts of the facial steamer, including the water reservoir, nozzle, steam outlet, and any other detachable components. Ensure that they are appropriately aligned and firmly fastened.
-
Double-check for any loose parts: Before plugging in and using the facial steamer, double-check that all components are properly secured and there are no loose parts. Loose or improperly assembled parts can affect the performance and safety of the facial steamer.
-
Plug in and test: Once all the components are securely reassembled, plug in the facial steamer and test it to ensure that it’s functioning properly. Follow the manufacturer’s instructions for operating the facial steamer safely and effectively.
By carefully reassembling your facial steamer according to the manufacturer’s instructions, you can ensure that it’s ready for your next facial steaming session. Proper reassembly will help to maintain the performance and longevity of your facial steamer, ensuring that it continues to provide you with the desired results for your skincare routine.
Also Read: Philips Garment Steamer Not Working.
Step 8: Final Tips and Maintenance
Congratulations! You’ve successfully cleaned and reassembled your facial steamer. To keep it in optimal condition and extend its lifespan, here are some final tips and maintenance suggestions:
-
Regular cleaning: Make it a habit to clean your facial steamer after every use. This will help prevent the buildup of mineral deposits, dirt, and bacteria, ensuring that your facial steamer continues to work effectively.
-
Use distilled water: To minimize mineral deposits and potential clogging of the water reservoir and nozzle, use distilled water instead of tap water. Distilled water is free from minerals that can accumulate and affect the performance of your facial steamer.
-
Avoid harsh chemicals: When cleaning your facial steamer, refrain from using harsh chemicals or abrasive cleaners, as they can damage the components and affect the performance of the steamer. Stick to mild soaps or detergents and gentle cleaning methods.
-
Store properly: After cleaning and reassembling your facial steamer, store it in a cool, dry place to prevent moisture buildup, which can lead to mold or mildew growth. Avoid storing it near direct sunlight or in a damp environment.
-
Follow manufacturer’s instructions: Always follow the manufacturer’s instructions for cleaning, maintenance, and usage of your specific facial steamer. Different models may have different requirements, and following the manufacturer’s guidelines will ensure that you’re taking the appropriate steps for your specific facial steamer.
Frequently Asked Questions
Q: How often should I clean my facial steamer?
A: It’s recommended to clean your facial steamer after every use to ensure it works efficiently.
Q: Can I use soap to clean my facial steamer?
A: No, it’s not recommended to use soap or any harsh chemicals to clean your facial steamer as it can damage the components.
Q: Can I put my facial steamer in the dishwasher?
A: No, facial steamers are not dishwasher safe and should be hand washed only.
Also Read: Facial Steamer Not Heating Up.
Conclusion
Properly cleaning and maintaining your facial steamer is crucial to ensure its effectiveness and longevity. Following the steps outlined in this guide, including gathering cleaning supplies, disconnecting and emptying the steamer, disassembling and cleaning its components, reassembling it, and incorporating regular maintenance tips, will help keep your facial steamer in optimal condition.
By using distilled water, avoiding harsh chemicals, and following the manufacturer’s instructions, you can prolong the lifespan of your facial steamer and continue to enjoy its benefits for your skincare routine. Remember to always refer to the manufacturer’s instructions for your specific facial steamer model to ensure proper care and maintenance.